
Gluten-Free Banana Oat Waffles
This incredible gluten-free banana oat waffles recipe requires only one kind of flour—oat flour! The waffles are delicious, easy to make, and healthy, too!

Updated by Kathryne Taylor on July 10, 2025
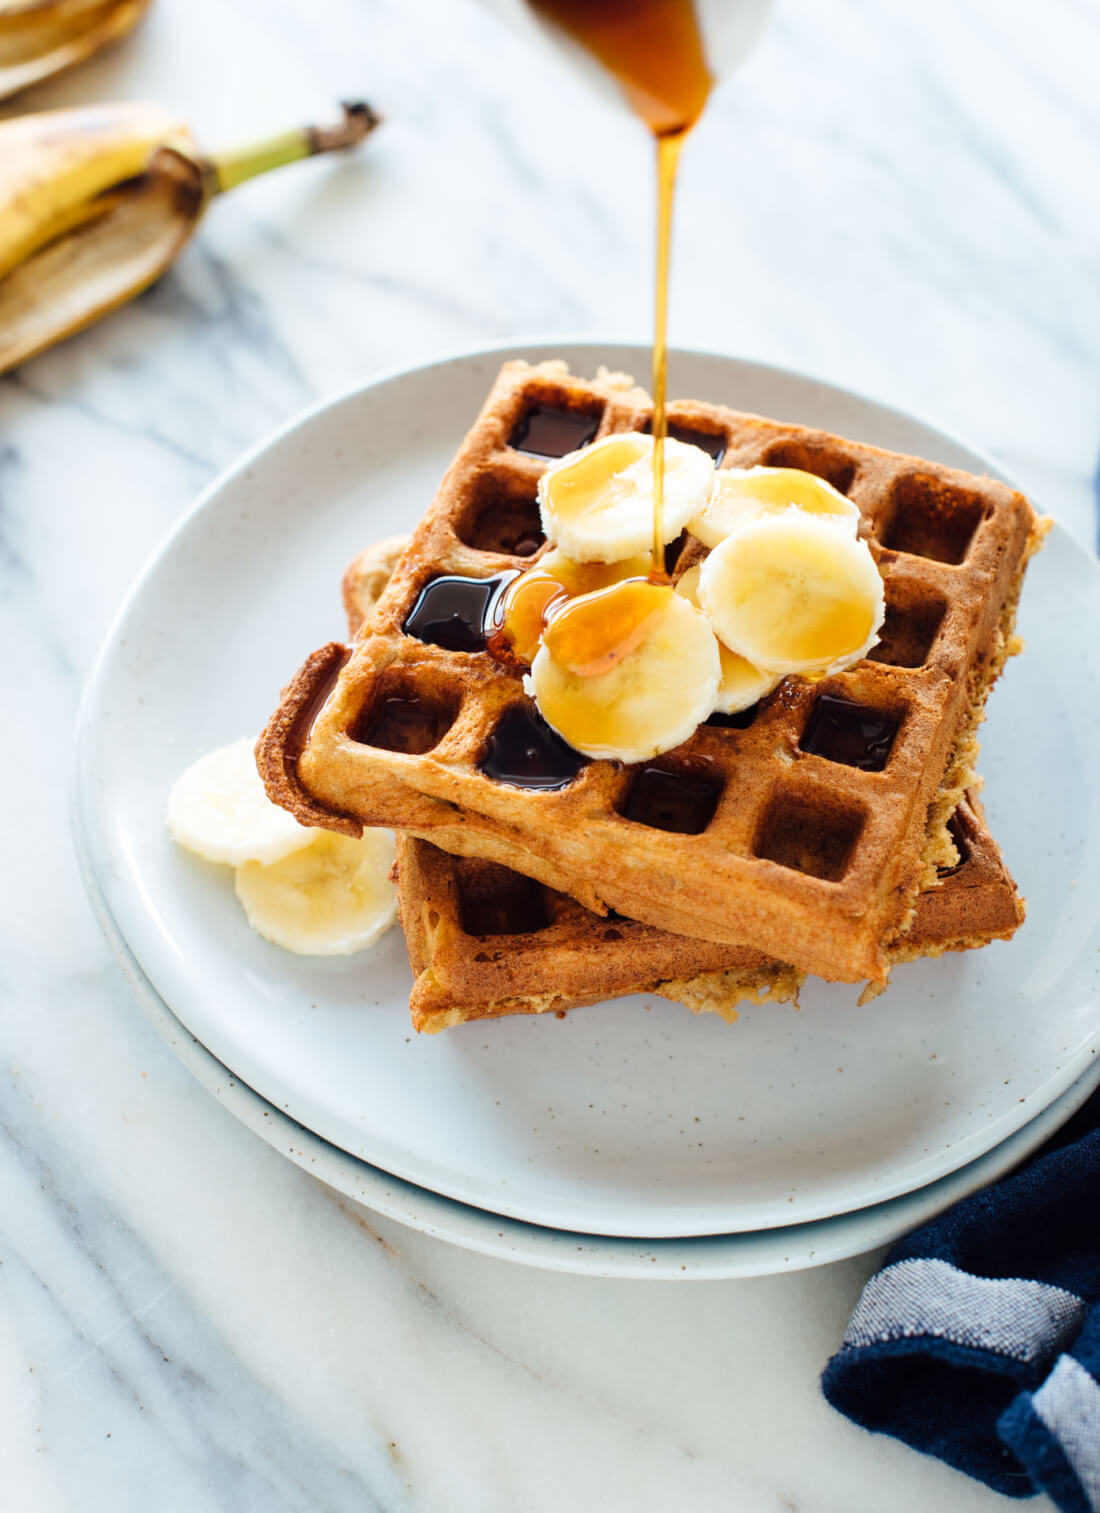
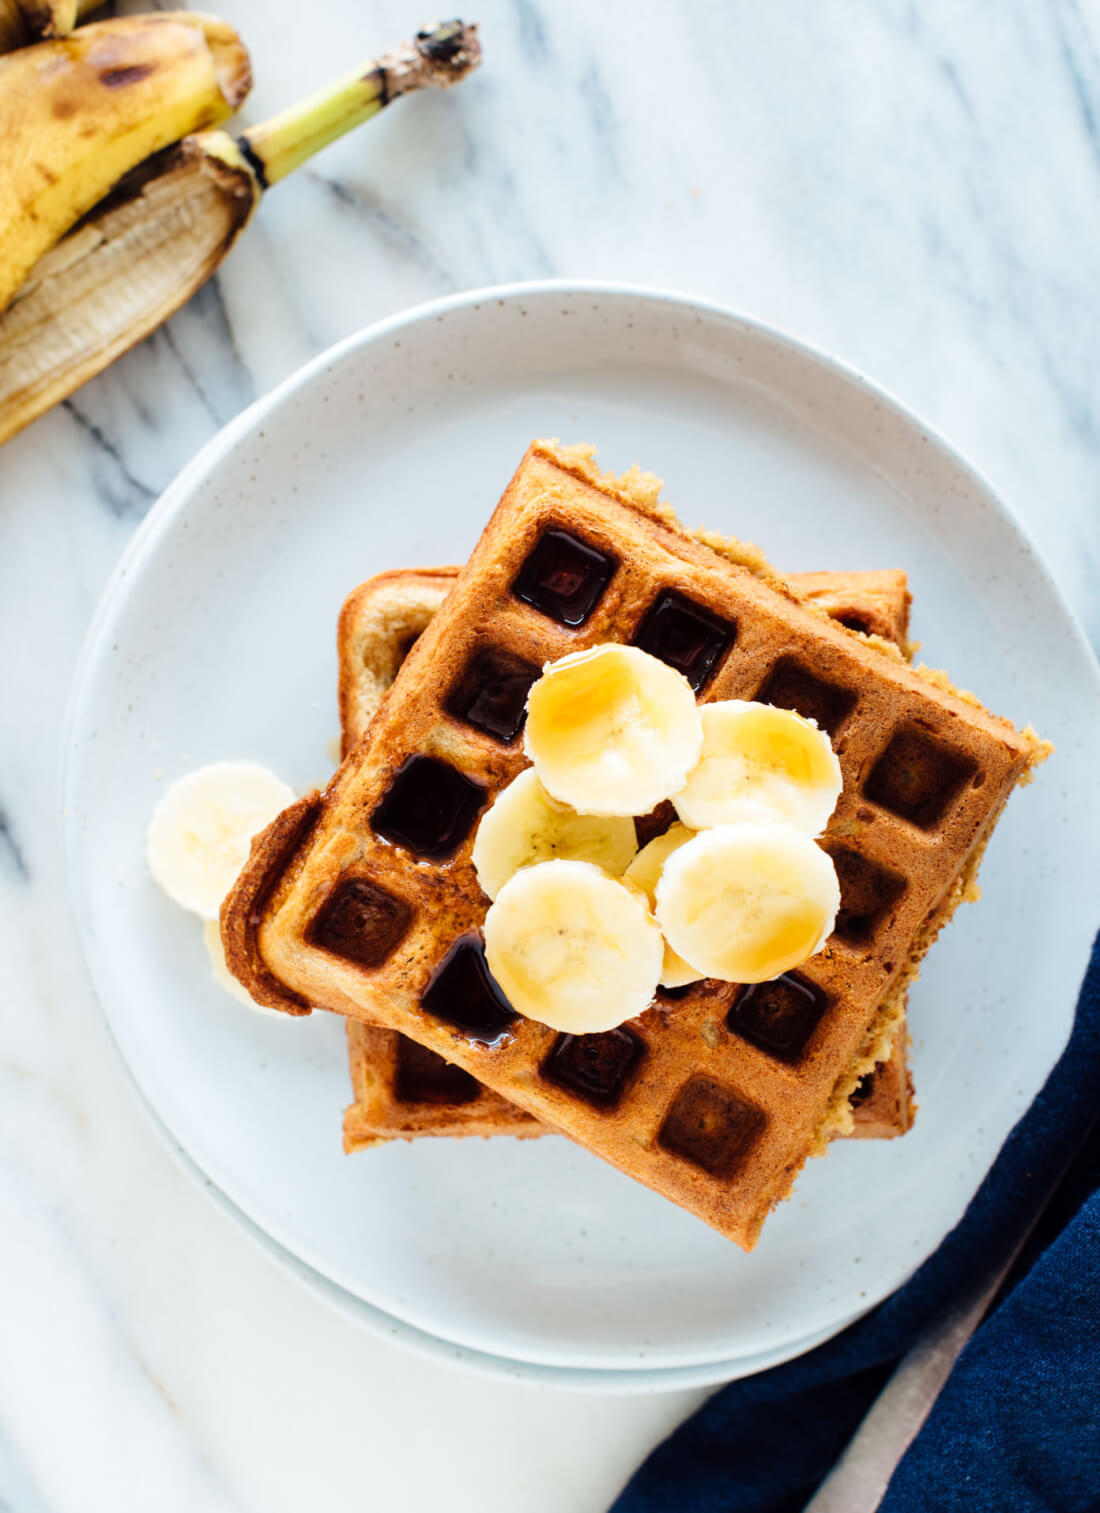
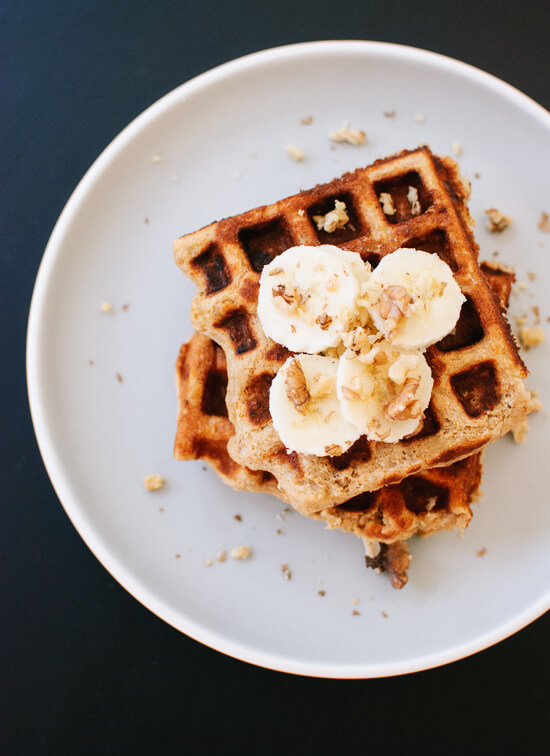
These banana waffles are fluffy, light, crisp and infused with banana flavor. Instead of traditional all-purpose flour, they’re made with hearty oat flour, making them conveniently gluten-free, whether you need them to be or not. Above all, they’re delicious.
Aside from the oat flour and some optional cornstarch or arrowroot starch, which helps make them extra light and fluffy, the recipe calls for fairly standard waffle ingredients.
Very few recipes from this blog made it into my cookbook, but I had to include my gluten-free oat waffles. They’re my all-time favorite waffles, and many of you share the same sentiment.
I’ve received a number of requests for a banana version of those waffles. I thought I could replace the pumpkin with banana in my pumpkin oat waffles, but it wasn’t that easy. After six tries, I’ve finally nailed it. Here it is!

More Banana Breakfast Treats
If you don’t have a waffle maker, check out my banana oat pancakes recipe or even simpler 3-ingredient banana pancakes (choose the oat flour option).
Here are a few more delicious gluten-free, banana-flavored breakfast recipe:
- Banana Almond Smoothie
- Gluten-Free Banana Bread (Made with Almond Flour)
- Gluten-Free Banana Muffins (Made with Almond Flour)
Please let me know how your banana waffles turn out in the comments! I love hearing from you.
Gluten-Free Banana Oat Waffles
This incredible gluten-free banana oat waffles recipe requires only one kind of flour—oat flour! The waffles are delicious, easy to make, and wholesome, too. Recipe yields 8 small waffles (as shown in photos; your yield will depend on your waffle iron).
Ingredients
- 2 ¼ cups (200 grams) oat flour*, certified gluten-free if necessary
- 3 tablespoons packed coconut sugar or brown sugar**
- 2 tablespoons arrowroot starch or cornstarch***
- 1 tablespoon baking powder
- ½ teaspoon salt
- ½ teaspoon cinnamon
- 3 large eggs
- 1 cup milk of choice (I used almond milk)
- Scant ½ cup melted coconut oil or 7 ½ tablespoons unsalted butter, melted
- ¾ cup mashed ripe bananas (about 2 medium)
- 2 teaspoons vanilla extract
- Suggested toppings: thinly sliced banana, maple syrup or honey, peanut butter and/or toasted nuts, whipped cream…
Instructions
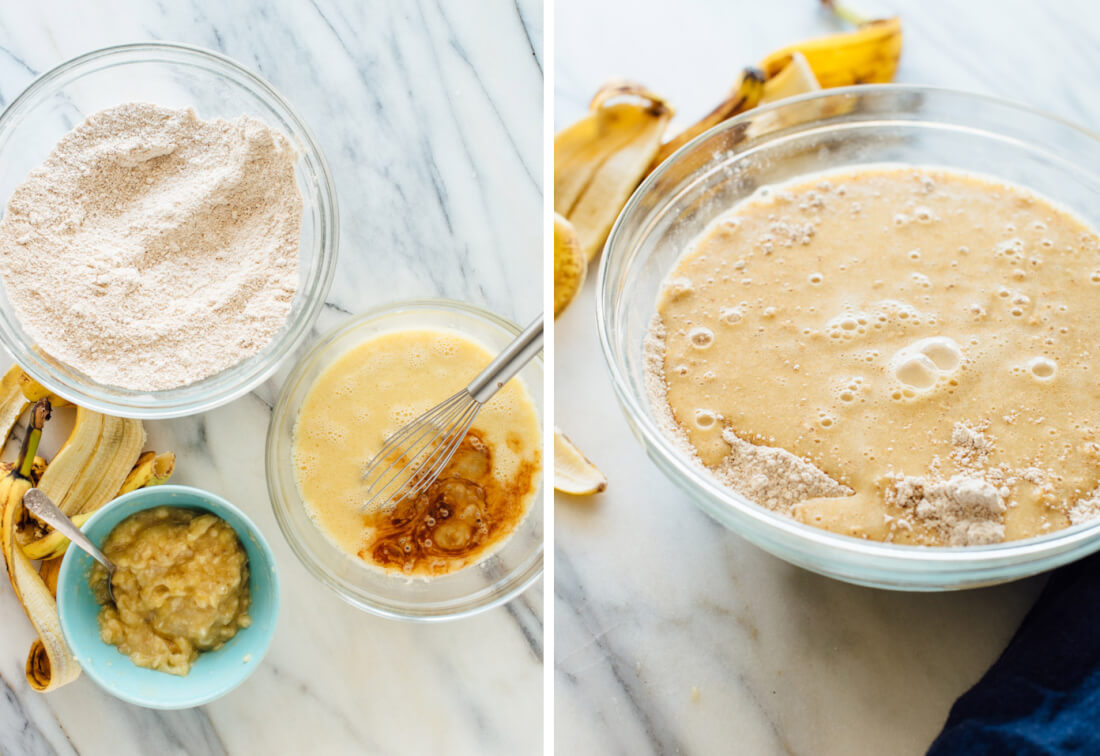
- In a large mixing bowl, combine the oat flour, sugar, starch, baking powder, salt and cinnamon. Whisk to combine.
- In a medium mixing bowl, whisk the eggs. Then add the milk, coconut oil or butter, mashed banana and vanilla extract. Whisk until the mixture is thoroughly blended.
- Pour the liquid mixture into the dry mixture. Stir with a big spoon until combined (the batter will still have a few lumps). Let the batter rest for 10 minutes so the oat flour has time to soak up some of the moisture. Plug in your waffle iron to preheat now (if your iron has a heat setting, set it to medium-dark).
- Once 10 minutes is up, give the batter one more, gentle swirl with your spoon. The batter will be pretty thick, but don’t worry! Using a measuring cup, pour batter onto the heated waffle iron, enough to cover the center and most of the central surface area, and close the lid.
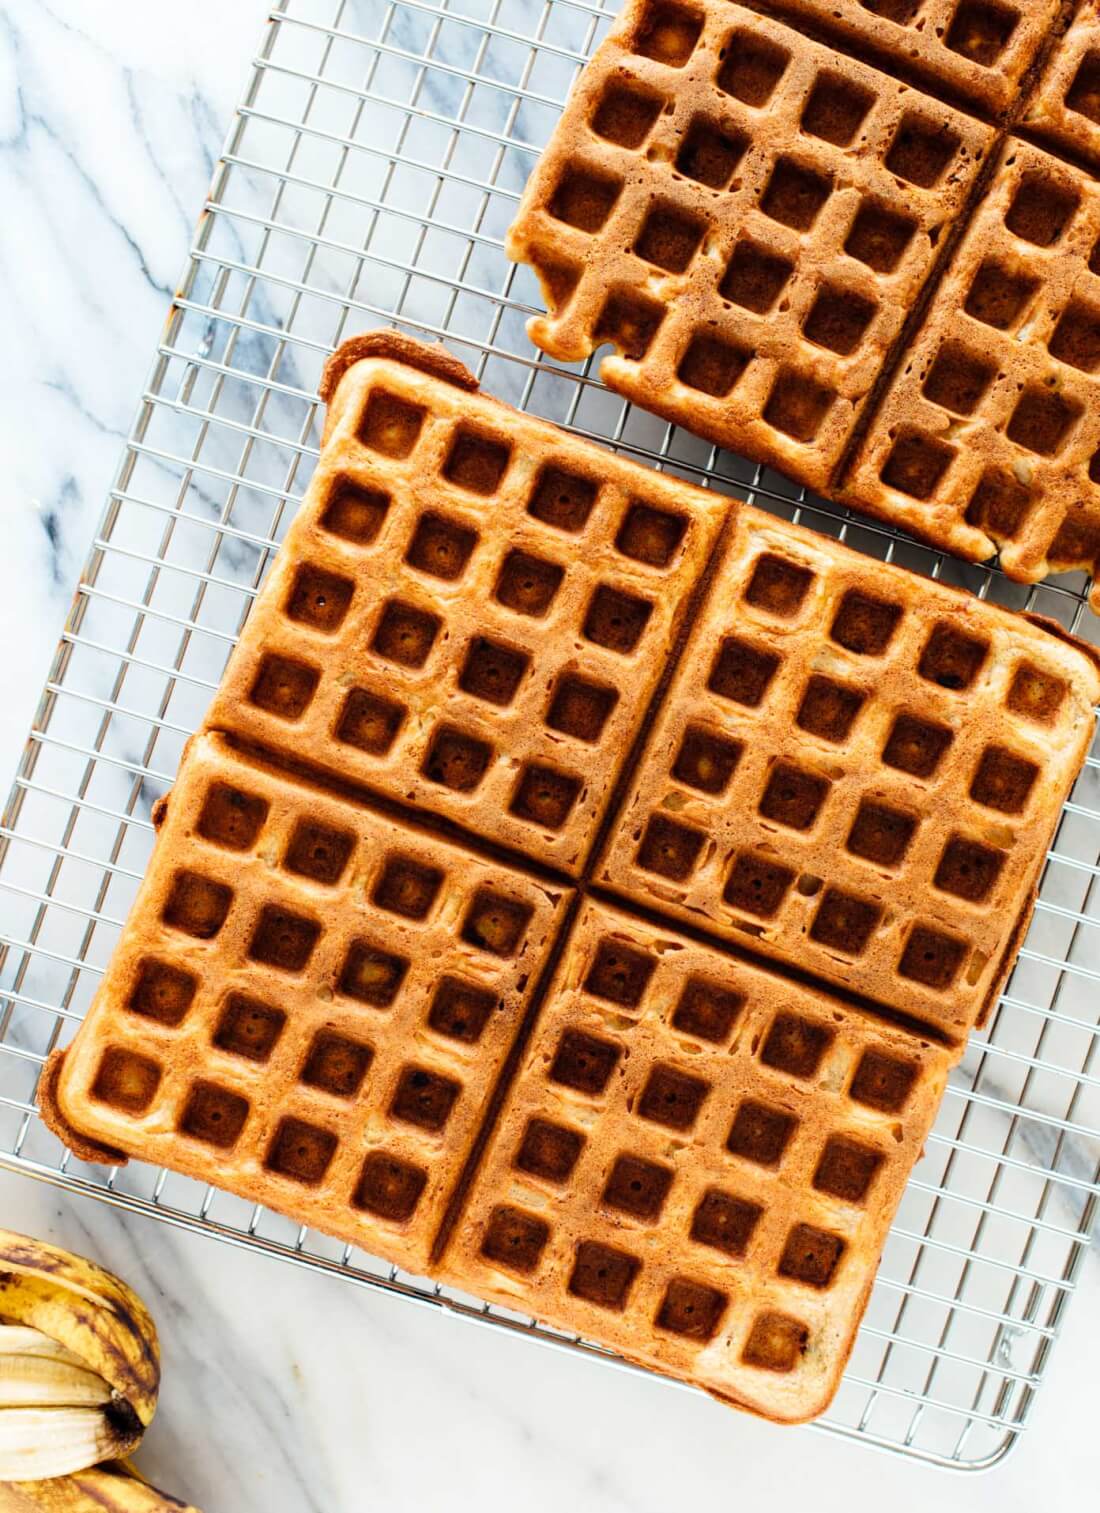
- Wait to check on the waffles until most of the steam has stopped billowing out the sides (this takes 5 to 6 minutes in my waffle maker). Once the waffle is deeply golden and crisp, transfer it to a cooling rack or baking sheet. Don’t stack your waffles on top of each other, or they’ll lose crispness.
- If desired, keep your waffles warm by placing them in a 200 degree oven until you’re ready to serve. Repeat with remaining batter and serve with desired toppings.
Notes
Recipe adapted from my gluten-free oat waffles and banana nut waffles.
*Make your own oat flour: Simply blend old-fashioned or quick-cooking oats (be sure to buy certified gluten-free oats if necessary) in a blender or food processor until they are ground into a fine flour. You’ll need to blend at least 2 ¼ cups oats to make enough flour for these waffles (you will probably end up with a little extra). Once you’ve blended the flour, measure it using the spoon and swoop method to make sure you have the right amount.
**Sugar note: Sugar in waffle and pancake recipes help prevent the batter from burning against the hot skillet. Granulated sugar is key in this recipe, and works better than maple syrup.
***Starch note: The starch helps the waffles turn out extra light and crisp. You can omit it if you don’t have it.
Make it egg free: You should be able to just omit the eggs. That has worked well for me in the regular oat waffles. Please let me know if you try!
Make it dairy free: Use non-dairy milk and coconut oil.
Make it vegan: Use non-dairy milk, coconut oil and omit the eggs.
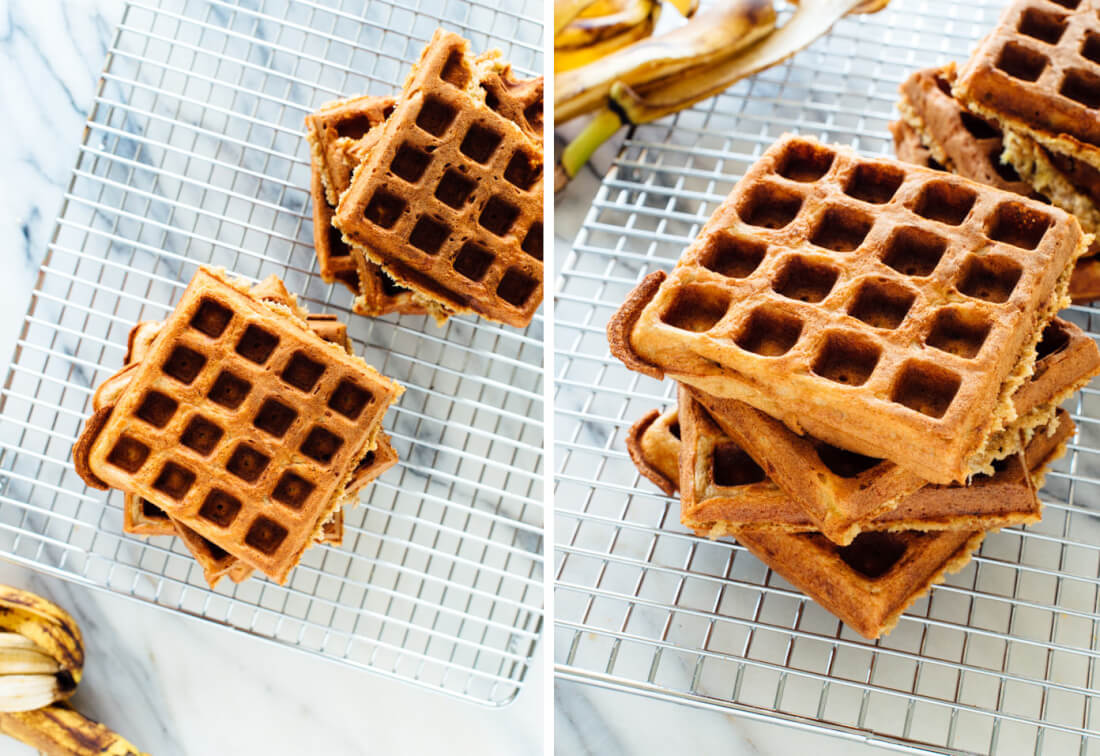
Freeze it: These waffles freeze beautifully. Store them in freezer-safe plastic bags and pop individual waffles into the toaster until warmed through.
Nutrition
The information shown is an estimate provided by an online nutrition calculator. It should not be considered a substitute for a professional nutritionist’s advice. See our full nutrition disclosure here.










These look so yummy! I have been wanting to try a new waffle recipe, but we haven’t had any luck with our waffle makers. We have been through two so far. Do you have one that you recommend even with vegan waffles? Thanks!
Hi Tracy! Waffle makers definitely vary a lot by manufacturer. I recently tried using a cheaper “non-toxic” option and my waffles took so much longer to cook and didn’t turn out nearly as crisp. I love my Calphalon waffle maker for its large, hot cooking surface, but it’s been discontinued. :( This Cuisinart Belgian waffle maker looks very similar and has great reviews.
I heartily concur, Kate! I’ve had this one for 2.5 years and use it multiple times a week most weeks, as it comes with a pancake plate, too. It has worked very well! I highly recommend. It’s actually just now starting to show signs of slowing down in it’s performance, i.e. not browning evenly, but I have definitely gotten my money’s worth out of it.
Can you make pancakes with this recipe?
Hi Suzanne, waffle and pancake recipes are a little different—mostly, waffles contain more fat so they crisp up. Fortunately, I already have a banana oat pancake recipe, so please use that one!
I can’t wait to try these! Your oat waffles were the first recipe I ever tried on your blog and it was love at first try.
Thank you, Danica! Hope you love these just as much. :)
YES to a baked good recipe with oat flour- not about buying a fancy array of gf flours :) This looks like my next sunday morning meal!
Right?! Oat flour is so delicious, too.
Hi! I love your blog! Probably a really crazy question, but could I substitute rolled oats processed in a food processor for the oat flour? I kind of love out in the sticks and don’t have many options other than what I can get at our one grocery store and the farmer’s market. If not, I can just wait until I make a bother big kitchen essentials order online. Thanks!
Wow the typos. Sorry! I should have proof read.
Hey Whitney, not a crazy question at all! You can do that, actually. Oat flour is super easy to make. See my recipe notes for details!
Hey, Whitney! Yes, that would absolutely work! That’s the exact recipe for homemade oat flour. :)
I’m sure you’re in a flurry of motion during these next few weeks, but I’m so excited for your book. I know it’s going to be spectacular. In the meantime, I’m going to have to make these waffles, because they also look spectacular.
Thank you so much, Allyson! xo
these definitely look gorgeous in so many ways!
a huge congratulations <3
Thank you, Dixya!
This looks amazing!!
Thank you, Sara!
I was making my way through a pinto bean waffle topped with a poached egg and guacamole as I was reading this recipe, which made me thinking – do you have any (favorite) savor waffles recipes? Browsing your blog, I think I’ve come across sweet options only. Or should I maybe wait for my preordered copy of your book? ;)
Hi Barbara! Thank you so much for pre-ordering my book. That really helps the book’s ranking. :) I don’t have a savory waffle recipe yet, but it’s on my list! A savory cornmeal waffle would be so good with guac and an egg on top…
So excited to make these in the morning for my toddler and hubby! My little guy is allergic to eggs. I see in your notes you say to omit them? Should I replace with anything? A fleas egg maybe? Thanks for all the great recipes!
Hi Nikki, you should be able to just omit them. Flax eggs are not so necessary when dealing with batter against a hot pan, like pancakes and waffles. Hope they turn out great!
I don’t normally crave waffles, but something about this cold and rainy morning we’re having here has me wanting a plate of these beauties.
I wish I could teleport you some! I have extras. :) Stay warm out there!
I could eat 97 of these right now – they look so delicious!
Ha! This made me smile. That seems like just the right amount of waffles. ;)
Hubby and I just ate, so delicious!! So glad you spoke about the need to let it sit for 10 minutes….the last time I used oat flour in pancakes it was so gritty, had not touched my oat flour since. Glad I now know how to use it, thanks!
You’re welcome, Jennifer! I’m glad that tip worked out for you. :)
I made these waffles last night. Hands down the best flavor of any waffle I’ve ever made or had! The natural sweetness of the banana was enough I didn’t even need maple syrup. Definitely becoming a staple in our home. I’ll be making several batches and freezing them for my upcoming maternity leave. Thanks for the wholesome + delicious treat!!
Hooray! This is so great to hear, Ashley. I hope these keep you full and happy welcoming your new babe home!
Delicious! Easy to make, nice and crispy with a yummy banana flavor.
These look stupendous! Gotta try them once my naners ripen!
Yes! You’ll love them.
I love this recipe and so does my 2 year old. I am just wondering if it is possible to make the batter ahead of time and let it sit over night?
Hi Steph, unfortunately that won’t work well. But, these do freeze well and are great toasted!
I was wondering if they really need that much oil? Seems like a lot because I know I’d end up eating at least 1/4 the recipe. What happens if you cut the oil by half? Too dry? Too soft?
Hi Katherine, good questions. Waffles require more fat in order to crisp up. They won’t be as crisp and tasty with less oil. I’d personally rather eat pancakes than soggy waffles!
I cannot wait for your cookbook to come out! It’s such a cold, rainy day here; it has been since yesterday and the forecast shows the same for at least another day! I’m sitting at home trying not to let the weather affect my mood, but no such luck. Since I don’t have your book to read yet, I thought I’d browse your website and hope for a pick-me-up and what do you know… it worked! I am so excited to try these waffles that I might change our dinner plans to make these instead! As always, thanks Kate! I have never ever EVER tried a recipe of yours that I didn’t like, or didn’t turn out! From, your biggest fan :)
Aw, Trina! This comment is full of so much goodness, thank you! I’m so happy these waffles lifted your mood–dreary weather does the same thing to me, so I empathize. And, I always endorse breakfast for dinner! I say, go for it. :)
These were awesome. My 3 and 1 yr old both really enjoyed these.
Thanks for the great recipe. I am always looking for healthy breakfast ideas that are wheat free and low in sugar.
Perfect! Thanks, Tanika. I’m glad the kiddos loved them, too.
Hi Katie,
Thanks for all your amazing recipes. It really helps when trying to stick to a healthy lifestyle.
I don’t like eggs at all!! And can taste it in about anything. So I omitted them in the recipe and came out perfect!!
Just letting u know :)
Good to know, Kim! Thanks.
Made these today and the entire family loved them: husband, mother in law, kids, and me. We found them nicely filling, and the leftovers made good picknick fare. They weren’t overly crispy but we didn’t mind. I appreciated that they didn’t stick to the waffle iron. Thanks for another wonderful recipe!
So great …. i so happy today …
This is my new favorite waffle recipe! They have so much more substance and flavor than traditional waffle recipes. I never thought I Would say it, but these are so naturally sweet that maple syrup tastes too sweet to me on them. I enjoy them with a nice dollop of sugar-free applesauce on them, or even just plain. Your berry chia jam is also delicious on them. I like to keep a bag of these in the freezer for a quick and tasty snack.
I’ve heard that comment about the sweetness before, Becky! You’re not alone on that one. I’m so glad you love the waffles!
Can you add ground flaxseed?
I don’t see why not! I think a tablespoon or two would be fine, you’d just want to watch the batter for dryness/thickness.
Currently waiting for a copy of your book Kate! Can’t wait to try out these new recipes!
Thanks, Ashley! I hope you like the book.
have you ever used almond flour? I have been wanting to try it to replace flour in recipes but I have been to afraid to try. Is it a one to one replacement?
I haven’t with this recipe, but I know for sure it’s definitely not a one-to-one replacement. I’d suggest finding a recipe that was written specifically for almond flour, as it behaves much differently than any other flours.
These are really good. Come together pretty quickly and simply too. If you like sweet throwing in a handful of chocolate chips doesn’t hurt either…☺
Sounds like a great add-in!
Success. The most perfectly textured gluten free waffles I have ever made. I used millet flour instead of oats – cuz that’s what I had. And I used “flax-seed eggs” because my daughter is allergic. They were delicious! Thank you for the tips at the end of your recipe.
I’m happy to hear that, Shirley! Thank you for letting me know how the substitute worked for you. I appreciate the review.
Hi Kate,
This is my very first comment on any such website. Your oat waffle recipe is superb. My son just loves them. I make a week’s batch and freeze for him to eat for breakfast. Thank you so much for sharing!
You’re welcome! I’m glad you commented and tried the recipe. If you would want to leave a star review, I would appreciate it!
OOOH This recipe looks good! can you make your own oat flour at home?
Yes you can! Use rolled oats and blend them in a high power blender.
The best oatmeal waffles I’ve ever had. So fluffy and light and flavorful. I also made the batter into pancakes (halved the brown sugar and oil and left out banana) and they were perfect. Thank you!
I’m happy to hear that. Thanks for your review, Rachelle!
Hey Kate!
Congratulations, on your book’s success! The world needs to have more healthy, happy foods, like these AMAZEBALLS waffles! We added organic cacao nibs to part of the batter & made a double batch, because the plain recipe also does double-duty as BREAD for us! Winner, winner chicken (or tofu) dinner! We use a Krups Belgian waffle maker, with removable plates. In. Love. Thank you, for venturing into the test areas of great-tasting&healthy foods for those of us lacking the time for it! XO
Thank you! Ha, I love that. I appreciate your review.
Great recipe, my kids love it. A few changes I made to the second batch, which turned out absolutely perfect: I let the batter sit for more like 30-45 minutes, the waffle maker was on high from the beginning, and I reduced the butter to about 4 1/2 Tbsp.
Thanks for sharing, Becky!
These turned out great! Thank you for this healthy recipe.
You’re welcome!
Another great recipe! The waffles have just enough sweetness that they are really satisfying plain- will try leftovers with almond butter :).
Almond butter with these is a delight! Thanks for sharing, Hilary.
Hi Kate – Its Feb school break here and my team has requested buttermilk pancakes. Id love to use your recipe. Can I use buttermilk as my milk choice? I am referring to the recipe in your book.
Thanks!
Hey Amy! I might be too late, but I’d stick with regular milk just because I’m not entirely confident that buttermilk will turn out as well.
I made these yesterday and they turned out perfect!
Awesome Recipe!
Thank you
You’re welcome! Thank you for your review, Elisa.
Hi Kate: My name is Janice and I think the coconut oil is high in saturated fat in this recipe with 24 grams sat. fat. What other type of vegetable oil have you tried or would you suggest for this? I really do not want 24 grams of saturated fat because I am trying to lower my cholesterol level to normal.
Hi Janice! I have not tried other vegetable oils, but I suspect they would work. It might be interesting to use mild olive oil, such as California Olive Ranch Everyday. I have used that in my muffins and could’t taste it in the end product, but it’s possible that it would impact the flavor. Waffles are typically high in fat content because the fat is necessary to get crisp outsides. If you want a lighter option, I’d suggest pancakes! Here are my pancake recipes.
This waffle recipe is fabulous! It will become my go to gluten free waffle recipe.
I’m happy to hear that, Hilary!
These are so good. I made them this morning. I added blueberries to some of them and added some almond flour (less than 1/2 cup) bc I ran out of oat flour. Otherwise followed the recipe. Amazing!
Thank you for sharing, Eva!
This recipe is fantastic! My criteria for any recipe is that it has to be so good that my family thinks “YUM” instead of “health food”—it has to be something we would eat whether it were healthy or not… because eating should be fun! This recipe has completely replaced my regular waffle recipe. My married daughter made it for her gluten-free husband and they were ecstatic! They fed some to my 19-year old picky-food-snob son and HE was ecstatic! Thank you SO much! (We use unsweetened vanilla-flavored almond milk and coconut oil. We used raw cane sugar the first time—only about 1 tablespoon—and it was still incredibly sweet and delicious. I’ve started making it without any sugar at all and we don’t see any difference.)
Hi, THANK YOU so much for sharing the recipe. This was my first time trying out waffles. As i always wanted to but was never sure how they would turn out. I abosolutely loved ur recipe ! My daughter is 28 months old n has food allergies so she cannot have gluten, dairy, nuts, soy, peanuts etc…so i keep looking for new recipes for her. She does not like oats, i have tried in various forms but this one was a hit with her too …she loved them.
I used water instead of milk as i did not have coconut or other replacement milk.
This is definitely going to be one of my fav breakfast recipes! Thanks
I’m glad she was able to eat these and love them too! Thanks for your review, Farida.
Thank you for posting this recipe. I made some and they turned out nice even though I made a mistake while trying to halve the recipe. I also reduced the sugar and did not have starch. How do you think I can best adjust the recipe if I want to add some ground flaxseed? Thank you
You’re welcome! Flaxseed should work ok. I haven’t tried it though.
Just made these. DELICIOUS!! I replaced half the coconut oil with tahini, and 1/2 cup of the oat flour with chickpea flour just to up the nutritional value. Still super light and fluffy. New favorite!
Hooray! thanks for sharing, Danna.
Banana Oat waffles were supper tonight. They turned out just right. Will make again as none are left. Hubby enjoyed them as did I.
Thanks
Breakfast for dinner, I love it! Thank you for your review.
Thank you SO much for this recipe!! I tried it a few years back when my husband cut gluten out for a bit and they turned out great. I then tried again recently as my 3rd nursing baby has many food sensitivities. I have a super restricted diet, but made these as my birthday dessert the other night as I haven’t been able to have dessert for the past 9 months. I had to omit some things but they still turned out amazing. These were my changes…
No eggs
No startch
Sub Baking soda + cream of tar tar to make baking powder since the baby is sensitive to corn
1/2 the amount of coconut sugar with a super ripe banana
Thank you again, it felt like a super special dessert for my bday and I was so thankful it didn’t cause any reflux or tummy problems for my little guy. I may try and give him one soon!
Hi Kate. I just made the waffles, using 2 flax eggs and 1 regular egg and they are perfect! My picky 5 yo asked for seconds which is unheard of! Also, my hubby is GF so needless to say these waffles will become the staple in this house! Thank you so much!
You’re welcome! I’m glad they were a hit with your picky eater.
Hello Kate! Thank God we still have things in the cabinet to create! Having dried ingredients and canned/jarred goods helps too. I made these vegan by subbing eggs for apple sauce.
1 egg=3/4 c applesauce
(Everyone, get some rice, barley, oats…and canned goods.)
I didnt have coconut oil nor butter, so I used vegetable oil. They turned out perfect. Great recipe!
Love love love this recipe!! Made a big batch and froze some.. Making another big batch except this time i’m cutting the oil in half because my heartburn was pretty bad after eating waffles and then homemade gf pizza for lunch.. Im thinking theyll still be crisp since I reheat them in the toaster oven!
Hi Jessica! How did those “less fatty” waffles turned out? I’m curious to know if it worked! :)
Hello! My first time here, I made this recipe today With new waffle plates that I got for my griddle and turned out amazing! The smell while they were cooking was delicious and the taste was perfect, Thank you for this great recipe!
These waffles are absolutely delicious!! Crispy but fluffy on the inside, and packed with flavor! You can tell they’re a bit ‘fatty’ but oh my, they are worth it eheh :D I’ll definitely keep this recipe!